Tuesday, 18 December 2012

Prezzies and stuff

My boyfriend Toby, and I have been together for just over a year, but have known each other and been friends since we were about 5 and this will be our second Christmas together as a couple and we wanted to make a really good gift for his family. So... who doesn't love a good hamper!?
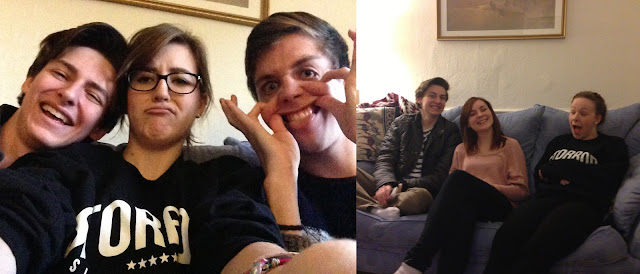
Awh look at us, just a few of my faves! 
I was mega lucky and managed to get a hamper for free from a friend but I found some really nice ones on eBay, but make sure you don't get a super expensive one because it can make the whole gift jolly pricey! I then filled it with the usual great things you expect in a hamper: wine, chutney, olive oil, chocolate, candles etc. Toby and I wanted to make it slightly more personal so we got each member of his family a gift to go in the hamper too and I only wrapped these bits. Check out how swanky it looks and my new approach to wrapping that looks like so much effort but results in not having to do tags!
Anyone got any gifts they're excited about giving?
Lil x


Finished hamper, filled with goodies!
What a freebie!
I just used plain brown parcel paper and then cut out their names from festive wrapping paper.
Toby's mum's gift.


Monday, 17 December 2012

Just a Simple One.


My beautiful mum and I share a love for craft and all things homemade! Over our stairs at Christmas time hangs a garland that my mum adores, she loves it so much that she got another one for our mantle piece this year and when she first bought it it was pretty bland so we added some extra bits to spice it up!


Drying out orange slices is a sooo simple and it makes anything look more christmassy! Here's how we made ours:
Once you've cut your orange into thick slices blot away the majority of the juice with kitchen roll and then lay them out on a rack on a baking tray. Baking them at gas mark 2/150C dries them out and gives them a lovely rich colour. We then attach them to the garland by piercing them with string, you could also use thin garden wire .

You can also dry out apple slices which look great too, but have it's trickier to store them because any moisture can turn them to a sticky mess! We also added cinnamon sticks and big, gold, ribbon bows.


Lil x

Wednesday, 12 December 2012

It's Beginning to Look a Lot Like Christmas!

Being a bit of a self confessed pinterest-aholic I can't seem to stop finding beautiful and creative things that I then NEED to recreate. Today we put up our Christmas decorations and so I thought I'd start by making these incredible snowflake decorations. Mum and I were watching 'Jamie's Best Ever Christmas' and give it a look because Jamie's kitchen is the most creatively decorated place ever! After seeing this, I perused pinterest and discovered this little tutorial and wanted to recreate it for you :) Here's my step by step guide to making some fab snowflakes and a few pictures of us constructing the tree:
Step One: You will only need paper, some scissors, some tape and a stapler. Any type of paper is good, I imagine the more adventurous the better! I chose the classic white for the ultimate snowy effect.
Step Two: It's just six pieces of paper required for this creation.
Step Three: If your bits of paper aren't already - make them square ℹ
Step Four: Do all steps up to twelve to all six pieces of paper. Fold the square in half.
Step Five: And then in half again.
Step Six: Cut three equally spaced apart lines along the folded edge of the triangle, making sure not to cut all the way to the end, otherwise it will fall apart!

Step Seven: Unfold the triangle and it will look like this.
Step Eight: Unfold it again and it will look like this.
Step Nine: Once unfolded, take the first two halves of the inner square and tape them together forming a roll.
Step Ten: Turn the whole thing over and join the next two halves together forming another roll.
Step Eleven: Turn it over again, roll and tape and repeat until the whole thing looks like this.
Step Twelve: Do this six times.

Step Thirteen: Staple three of the twirls together. And the other three.
Step Fourteen: Staple these sets of three together and you should have a pretty wobbly snowflake.
Step Fifteen: To not have a wobbly snowflake staple or tape each adjacent twirl together. This makes it super sturdy!! TA-DAH!

And to finish, some cheesy pics of us putting up the tree!


Ain't he gorgeous!


Anyone else as excited about Christmas as me?
Lil x

Saturday, 8 December 2012

A Wintery Stroll

About a week ago I spent the day with my friend Lucy, who we all call Baring. We took her lovely sister; Scarlett to her horse and therefore took the opportunity to take their dogs for a walk around the stables and fields. She finally sent me the photos we took and so here's just a mini post with some nice pictures! 


Dougall on the left and Baring with Max.

Ain't she gorgeous!?
Its a really pretty place!
The roundest sheep ever!
Little Dougall!
Absolutely loving blogging at the moment! Got so many ideas, so watch this space :)
Lil x

BIRTHDAY!!

Today was my birthday eek and I had a super lovely day!! After being woken by mum with a glass of coke (mega addict I know haha) I opened my cards with my favourite mog, Peter. 
This is Peter.
I had quite a slow and relaxed morning and then in the afternoon some of my nearest and dearest came round. Toby (the boyf) got me the most beautiful ring which is shaped like a heart and brought round the jumpers I had bought from his parkour team's shop - check them out they're amazing! Whilst prancing around in my storror jumper I opened presents and I also got some pretty wooden bunting and photo frame holder things, an adults colouring book, a bunny :) a beautiful clutch bag, a new alarm clock and from my parents an iPhone 5! Absolutely wow, the camera quality is incredible, all photos in the post are from it and the majority of future ones will be too! It's crazy how well my friends know me!


Ryan with my new clock, my beautiful ring, and Toby and Baring.

Liam, me and Ryan and Toby with my new Rabbit.

Oops repetition, me, Baring and Charlie reppin' the storror jumper and me and Nikki (who came all the way from Bath Uni, what an incredible friend!)

Liam, me and Ryan and then Liam, Nikki and Baring.

Toby then took me out for dinner and we went to Loch Fynne where the food is delicious - I had a tagliatelle style dish with scallops and clams and squid and Ginge had fish and chips. It's a fish restaurant if you hadn't gathered already. 


Such a cutie!


A beautiful day spent with beautiful people! 19 now. Ahhhh 20 next!
(Sorry for late posting, my birthday was yesterday - the 7th, but I was tired and the laptop was being rubbish so it had to wait until today!)

Wednesday, 5 December 2012

How to: Christmas Wreaths

Being a leader at a brownie pack makes finding new craft almost a weekly occurrence! Our Brown Owl came across this ingenious and quick way to make your own wreaths.
We used:
 - polystyrene ring from hobby craft £3.29 (although cheaper elsewhere I have since discovered) 
 - Multicoloured wool - we bought some from eBay as well as getting donations from parents, using fewer colours looks most effective although some of the girls went a bit nuts and the sparkly stuff proved to be the most popular!

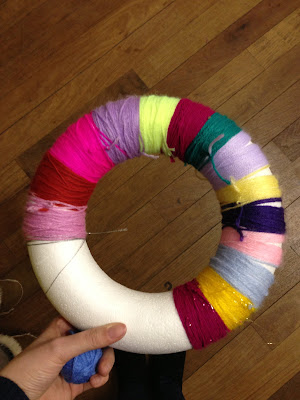
If you're a craft buff then I'm sure your starting colour and end can be carefully concealed by winding the wool round and round the same segment, with the girls however, we started them off by taping the first bit of wool to the ring. Then its as simple as just winding round and round changing colours now and again. Try not to get too tangled up although, check out some of the photos of the colossal knots some of the brownies got themselves into! We changed colours by tying the new wool to the next one, but again you could just do some fancy tucking techniques to hide all poking out bits. Wool worked really well but you could also try ribbon which would probably have better coverage!
Once its fully coloured and all white bits concealed we took some felt and cut out holly and flower shapes that we then glued on with a glue gun, we added some beads for the flower centres for the girls ones.

I went for the classic christmas colours combo and some holly.


Different wools, sparkly and fluffy too!
Multicoloured variations!

Some crazy knots


Hopefully this won't happen to you! Took a while to untangle!!
There are so many variations to try, why limit yourself to just having wreaths at Christmas time? One of them even had neon green in theirs!
Lil x


Saturday, 1 December 2012

Beginning With Some Baking!


As I'm a bit of a blogging virgin I roped my best friend Emma in to give me some help with pretty much everything! We've lived on the same road since we were about eight and so just a phone call and she's here in minutes, it's great! 
We made some Aero Meringues, here's how we did it:
All you'll need is some eggs, sugar, vanilla, mint aero and some green food colouring!

Make sure you have super sexy aprons!


Wash your hands, preferably with a double chin ;)
Separate 2 eggs using the whites only.


Whack out the whisk.

Peter got involved, he loves a bit of baking!

Whisk until you can do this.

Weigh out 110g of caster sugar and add in portions whilst whisking the whites.

Add some vanilla bean paste (Emma's dad is a chef so it's the fancy stuff)

Whisk until it all looks nice and fluffy.

Chop up a whole bar of Aero and add to the egg mixture.

Place large spoonfuls onto a lined baking tray.

Bake for 30 minutes at Gas Mark 2/150C.

And they should look like these beauties! We put in some green food colouring during the mixing but its not very noticeable. Just enough to make it look a tad more minty!

Enjoy with a cuppa :)
Got a bit snap happy, they're super yummy!
Give 'em a try and let me know how they go?
Lil x